Prosciutto Rolls with Mixed Greens

I absolutely love good dry-cured ham, any type - prosciutto, Serrano, Bayonne, Iberian jambon, etc. I think I could live off of it alone! So I'm always on a lookout for recipes that bring out the smokiness of these wonderful ham and add an unusual flavour.

This prosciutto-wrapped greens recipe is a great alternative to the traditional asparagus-prosciutto or a proscuitto-melon duos. The crunch of the greens and a hint of honey, add a bit complexity to the taste. This appetizer is easy and quick to put together and has a beautiful presentation.


Makes 12 rolls 
  • 12 prosciutto slices, sliced thinly
  • 1 cup mixed spring greens, packed
Dressing
  • 4 tbsp olive oil
  • 1 tbsp honey
  • 1 tbsp balsamic vinegar
  • 1 tsp Dijon mustard
  1. Combine the dressing ingredients, mix well.
  2. Place the greens in a mixing bowl, pour the dressing over it and mix gently to coat.
  3. Place about 1 tbsp of greens on a slice of prosciutto, roll up.
Read more »

Clay Pot Roast Beef with Mushrooms. Жаркое с грибами в горшочках


Testi Kebab getting prepared for us in Istanbul
One of the well-known cooking methods in Russia is making meat dishes in clay pots - with various vegetable and grain add-ons, filled with broth. The pot contents simmers gently and slowly, loosing little to no moisture and results in delicious and dreamy-tender meal.

The method of preparation of meat / fish in clay pots is well-known from the times of ancient Greece and is very popular throughout the Mediterranean region, including Turkey, with its own Anatolian version, called testi kebab. Africa has its clay pots' version - tagine; Germany - Römertopf; and other pot shape varieties in Asia.

Russian clay pots are the smallest in size, which makes them an ideal serving size. Lately, I've seen amazing clay pots in Russian retail stores, which look more like a work of art than a cooking utility. Generally, the recipes are awfully simple, the preparation is even simpler, and the presentation always gets a wow-feedback.

  • 700g / 1,5 lb beef chuck roast, cut into thin strips 
  • 100g / 2 strips Canadian bacon, diced (optional)
  • 250g / 1 cup sliced mushroom
  • 500g / 1lb potatoes, diced
  • 1/3 cup red wine
  • 3 tbsp vegetable oil
  • 1 tbsp sugar
  • 2 carrot, diced
  • 2 stalks celery, diced
  • 3 cups beef broth
  • 4 tbsp tomato sauce 
  • 2 tsp herbs of your choice, I prefer herbs de Provence
  1.  Saute onion until soft and golden, add bacon and beef. Cook until tender and browned.
  2. In a separate bowl combine cut-up vegetables, sugar, salt, pepper, spices to taste. In a separate bowl mix beef broth, wine, tomato sauce, add salt, pepper. 
  3. Fill 1/2 of the clay pot with the meat mix. Add the veggie mix until the pot is 3/4 full and pour the broth over it. The broth should cover the contents by half an inch.
  4. Cook in an oven for 60 min on 180C / 350F. Once done, take the pots out and let them cool for 15 minutes.
  5. Serve clay pot roast beef with mushrooms garnished with parsley.

Photo credit: http://abc8.ru/
Read more »

Oysters in Garlic Butter

Oyster purists might argue that oysters don't require any condiments. True, but sometimes, adding a bit of a punch to the oyster is just what's needed. This garlic butter is subtle enough to bring the flavour of the oyster to its high. The oysters in garlic butter is a simple but great recipe to add something different.
  • 6 tbsp unsalted butter, at room temperature
  • 2 cloves garlic, peeled
  • 4 tablespoons minced parsley
  • salt and freshly ground pepper
  • 24 oysters
  • coarse salt for baking sheet
  1. Preheat the broiler.
  2. Put the butter in a bowl. Press the garlic cloves over the butter and mix well. Add the parsley, season with salt and pepper to taste, and refrigerate. 
  3. Open the oysters and put them, in their shells, on a baking sheet filled with coarse salt. Add about 1⁄2 teaspoon of the parsley butter mixture to each oyster and broil for 1 to 2 minutes. 
  4. Serve the oysters in garlic butter immediately with rye bread.
Read more »

Turkish Stuffed Eggplant. Karnıyarık

In Turkey eggplants are everywhere - meze, main dishes, appetizers; broiled, roasted, mashed, diced!
The name of this dish translates as split belly or the belly is split and it originates in the Ottoman cuisine. When in Turkey I saw it in restaurant menus but stuffed eggplant seemed not-exotic enough to try in a new country's cuisine. So I filed it in my 'to-do' list and viola!

The recipe is quite complex and time-consuming to prepare but it is well worth the effort. As with many Turkish dishes, there is no overwhelming combination of spices, just a bit of pepper - that is why the vegetables should be the freshest and the best.


  • 6 eggplants (one per person), 20 cm in length, the ones you find at the farmers' market ones are best or in the worst case scenario use Chinese aubergines (but adjust the cooking time)
  • 2 medium white onions, diced finely
  • 5 garlic cloves, chopped finely or minced
  • 1 lb ground beef or lamb (using lamb is in the authentic Ottoman recipe)
  • 1 ripe tomato, diced
  • 1 tsp red pepper / paprika
  • 3 tbs tomato paste
  • 1/4 cup fresh parsley, chopped
  • 1 ripe tomato for decoration
  • green banana peppers or slices of green bell peppers, as many as eggplants, for decorating
  •  salt, pepper to taste
  1. Wash the eggplants. Using a peeler, peel the eggplant lengthwise, in 1cm-wide strips. Put the eggplants in salted water and press them down with a plate to prevent from floating up. Leave for 30 minutes - this will remove any bitterness.
  2. Preheat the oven to 180 C / 375 F.
  3. In a frying pan, saute the onions in olive oil, add meat and cook until no longer pink. Add the chopped garlic, diced tomatoes, tomato paste, and red pepper. Mix gently, add the parsley, add salt and pepper to taste. Remove from heat.
  4. Roasting eggplants: Remove the eggplants from water, dry with a towel. Line a baking sheet with foil, drizzle with oil and lay eggplants. Prickle the white strips with fork to allow better roasting. Pour 1 tsp oil over each eggplant and put the sheet in the oven for roasting. Check them in 15 minutes, turn them over, add more oil if needed. In 45-50 minutes the eggplants should be a bit charred. Prickle with a knife to check if they are ready - the knife should go in easily. Take them out, let them cool. 
  5. Now, a bit tricky here - with the two spoons, slit eggplants into two leaving the tops and bottoms attached. Fill with meat. The eggplant flesh should be very soft and give in easily for stuffing. On the top of each filled eggplant put a slice of tomato and a green bell / banana pepper slice.
  6. Lay the stuffed eggplants in an oiled baking dish. Mix 1 tbs tomato paste with 1 cup of boiled water and pour to cover the bottom of the dish.
  7. Put in a 350F oven for 30 minutes or until the peppers on top have softened.
  8. Serve with pide bread or plain white rice.
Read more »

Turkish Zucchini and Walnut Dip. Cerkez Kabak

After the recent trip to Turkey, I have been so taken with the wonders of the Turkish cuisine - it is so diverse and plentiful! The flavours and variety of meze dishes were so amazing that I really wanted to keep a few recipes from this country. This dip comes from Binnur Turkish Cookbook (http://turkishcookbook.com/) and it super easy to make (especially if you are using a processor to grate zucchini. 

  • 2 medium sized zucchini, finely grated
  • 1 tbsp extra virgin olive oil
  • 2 fresh green onions, finely sliced
  • 1/2 cup yogurt
  • 1/4 cup walnuts, crumbled
  • 1 slice of bread, crumbled (French or Italian style)
  • 1 garlic clove, smashed with salt

    Red Pepper Sauce:
    • 2-3 tbsp extra virgin olive oil
    • 1 tbsp red pepper (paprika)
    • 1/2 tsp Cayenne pepper
  1. Saute the zucchini with 1 tbsp olive oil in a pan until all the water evaporates. Let it cool down. 
  2. Add the rest of the ingredients and toss. Place on a service plate. 
  3. To make the sauce, heat up the olive oil in a small pan, add the red pepper in it and turn the heat off. Don't burn the pepper! Pour all over the zucchini and serve with toasted French baton bread or toasted pide slices.
Read more »

Korean-style Russian Carrot Salad. Корейская Морковка / Mорковча

Photo Credit: http://fb.ru/article/64680/koreyskaya-morkovka-dlya-poklonnikov-ostroy-kuhni
Another Russian culinary legend that you will absolutely surely encounter on your travels to Russia -  a crunchy and spicy carrot salad made with garlic, sunflower oil, and a few spices. It is so popular that it can be found in any market or grocery store.

The recipe is said to have come from the Korean emigres to the to the Russian Far East and Siberia of the early 20th century. In the Stalin era, under the migration program, the Korean population was moved to Central Asia. There the recipe got adapted by the local population and started spreading to the rest of Russia. Rumour has it that the original kimchi-like salad called for Napa cabbage, which was impossible to find, however carrots were widely available. 

  • 1 kg carrots,
  • 1 head garlic
  • 1/2 cup sunflower or any vegetable oil
  • 2 white onions
  • 1-2 tablespoons cayenne pepper
  • 4 tablespoons white vinegar
  • 1 tablespoon ground coriander
  • 2 bay leaves
  • 5 cloves gralic
  • 1 teaspoon black peppercorn
  • 3 tablespoons sugar
  • 1 tablespoon soy sauce (optional)
  • 2 teaspoons salt
  1. It is absolutely essential that the carrots are juliened, not grated into strips 2-4mm thick, while the length is optional. 
  2. In a large mixing bowl mix the julienned carrots with 1teaspoon salt and leave. 
  3. In the mean time, slice onions and skin garlic.
  4. In 30 minutes tip the bowl to drain the liquid. 
  5. In the same bowl, gather carrots from sides to the center to form a "hill" and make a bit of a hole in the center. Add cayenne pepper to the center.
  6. In a frying pan heat the oil until it is extremely hot. Add the sliced onions and bay leaves, fry until the onions turn golden-brown. Remove the onions with a slotted spoon and discard.
  7. Pour the oil into the crater of the carrot mountain.
  8. Add the minced garlic and the rest of the ingridents. Mix well, let it sit for 15 minutes. Now try the salad, add more spices or vinegar to your liking. 
  9. Move the salad to a glass jar / container and put in a fridge for 12 hours to marinate. Garnish with parsley and serve.

    Version 2
    Julienne 1 kg carrots. Add 2 T white vinegar, 2t salt, 1T sugar, 5 garlic cloves, mix and mash with hands. Lightly sprinkle with 1/2t red and black pepper each, 1/2t ground coriander. Let it stay for 30 min, pour the excess juice.

    Heat 1/3C sunflower seed oil till white smoke it visible. Add sliced onion, 3 cloves, 2 bay leaves. Fry till the onion turns golden. Discard the onion. Pour the oil over carrots, mix well. Let stay in the fridge for an hour.

Read more »

Food for thought and not only that: Les Compagnons de la Grappe

compagnons_grappe_2
Photo Credit: http://www.cartesurtables.com/

Les Compagnons de la Grappe
**** (out of 5)

26 rue Lepelletier
Lille, 59000, France
 

Neatly-tucked away from the hustle of Lille's centre, Les Compagnons de la Grappe offers traditional Flemish and French fare in a wonderful cosy rustic setting. The restaurant makes simple, honest, and great-tasting home-like meals in a similar setting.

The outdoor patio / terrace looks lovely and welcoming but even though the heaters were on, it was too chilly for a November night to enjoy food outside. It was pretty adventurous of us to head out on a Friday night with no reservations. The place was packed, but amazingly enough, we were seated immediately at a cute corner table by the fireplace. 

The decor is simple, bright and cheerful; the place exudes great ambiance. The menu was extensive with the regional Flemish specialties and French regulars; I picked a duck salad that I adore ever since visiting Gascony - Le Salade Composee (or Salade Landaise) with the best of the season - foie gras, magret de canard and gesiers. The plate was overflowing with goodness of regional produce - with potatoes on the side, the foie gras was very tender, the magret had just the right texture and smokiness, and the dish, overall, hearty and great-tasting. For desert we split a light rum baba that came with a generous portion of rum on the side.

The service was fantastic, quick and unobtrusive. The extensive menu options and the variety were a pleasant surprise in a restaurant that competes with hundreds of others in the category of Northern French gastronomy. I wouldn't hesitate going there again, actually, I just might.. soon!


Read more »

Bosnian Meat Bureks


While away from home, what Canadian food do my kids miss the most in France?! Not a burger, nor an apple pie, but the bureks that we used to buy at the local market in Canada. They had mentioned it so many times over the past weeks that my heart couldn't take the kids' culinary suffering no longer and I started the quest for a pseudo-burek.

Burek is a Mediterranean pie with various fillings, from meat to apples, made by a variety of ethnicities in Europe and Asia: Turks, Greeks, Croats, Bulgarians, Bosnians, Czech, etc. The commonality among all recipes is phyllo dough and the rest of the ingredients, as well as the shape, vary from region to region.

I call this particular recipe Bosnian because I tried to approximate the bureks that we buy at the local market in Canada, whose owner is (or at least I heard is) from Bosnia.

From the start I knew it would never make the dough the way it is supposed to be made - beautifully thin, flexible, moist, and live. I just don't have the skills for it. I went to the box French supermarket, Carrefour, bought a pack of phyllo dough. Unfortunately, the pre-made phyllo dough is not as flexible as home-made and I couldn't make those perfectly round pies.

Next time I'll try making Turkish cigar-shaped bureks by laying out the bureks in straight lines vs. trying to roll them.

What I created is not the original recipe by any means, mostly in the difference of the dough. Nevertheless, these bureks turned out to be really good. The phyllo dough added crunch to the top dough layer and the filling was savoury, tender and moist. Although the original bureks are great, these turned out different, but quite delicious.


Servings: 10 bureks, 10cm in diamer
Time: 1 hour

  • 1 pack phyllo dough, 10-12 sheets
  • 1 lb ground beef
  • 1 med. potato, grated
  • 1 white onion, finely chopped
  • 3 cloves garlic, finely minced
  • 1 egg, slightly beaten
  • 1 teaspoon paprika
  • 1/2 teaspoon all-spice
  • 1 teaspoon salt
  • pepper to taste
  • 1/2 cup vegetable oil

  1. Preheat the oven to 375F. Grease a large baking sheet. 
  2. In a large bowl mix ground beef, garlic, onions, grated potato, egg, and spices.
  3. Choose a large working surface, at least the size of a phyllo sheet - this can be a counter top or a large cutting board. Make sure it is not granite or wood: oil will ruin both.
  4. Grease the surface with oil and lay out the first phyllo sheet. Cover the rest of the dough with a towel to prevent drying out. Grease the sheet with more oil.
  5. Spread some filling length-wise. It should not be too much, just a bit of meat for each inch.
  6. Starting with the side closest to you, start wrapping the sheet in a loose tube. Once done, form a snail-shaped circle. Alternatively, lay them out in straight lines next to each other.
  7. Put the baking sheet with bureks in the oven for 30 minutes. Once done, let them cool for 15 minutes. Serve with sour cream.


Read more »

Chantilly Cream

Chantilly Cream over raspberries.
Photo credit: http://www.domainedechantilly.com/sites/default/files/M.Savart-IMGdessert.JPG

One cannot leave Chantilly without trying the Chantilly cream. Each village in France has its own culinary traditions and specialties, with Chantilly being no exception - this is an area that for centuries catered to the nobles' refined tastes.

Chantilly cream is what we might call whipped cream sweetened with sugar and flavored with vanilla, and sometimes, orange water or brandy. The origins of the recipe are ambiguous; some attribute it to Francois Vatel, an unfortunate chef at the Chantilly Castle, who committed suicide over the fish order that didn't come in time at the reception of Louis XIV in 1661. However, there is no mention of the cream in historical records until late 18th century.

Chantillois take pride in their cream - they say the amazing light taste of the cream starts with the grass and the grounds of the area that are unlike anywhere else. The cows must take their job seriously too - as replication of the recipe in any other area of France doesn't taste the same.

Truly, the cream we tasted there is like no other whipped cream - simply divine, light, subtle, and deep.

Official recipe of the Chantilly cream 
(http://www.domainedechantilly.com/domaine-de-chantilly/cr%C3%A8me-chantilly/recettes-officielles)

Preparation 15 minutes
Ingredients: 
  • 50 cl cream 
  • 40g icing sugar  
  • 1 vanilla pod
Put very cold cream in a bowl previously cooled in the refrigerator. Add the vanilla sugar and icing sugar. Vigorously beat the cream with a whisk or electric mixer until the cream thickens and forms waves. The cream is rising "Chantilly" when cream waves appear retain their shapes. Be careful at this stage as overeating transforms cream into butter!
 
For a pleasant change
Here are some other recipes:
All ingredients are to be incorporated in the cream when it has the texture of a sour cream.
Chantilly with herbs: 1L liquid cream 35% fat, 1 bunch dill, 2 tablespoons lemon juice, salt and pepper (to taste)
Chantilly Espelette pepper and tomato: 1L liquid cream 35% fat, 250g tomato paste, salt and pepper (to taste), sprinkled with Espelette pepper
Chantilly curry: 1L liquid cream 35% fat, 3 tablespoons curry powder, salt and pepper (to taste)
Pistachio Chantilly: 1L liquid cream 35% fat, 4 tablespoons pistachio flavor, 3 tablespoons icing sugar
Chocolate Chantilly: 1L liquid cream 35% fat, 4 tablespoons cocoa powder, 3 tablespoons sugar
Chantilly Raspberry: 1L liquid cream 35% fat, 150g raspberry jam, 2 tablespoons icing sugar

An official recipe of the cream in Chantilly Gardens

 
Read more »

The Chantilly Castle

Having experienced Lille's braderie in 2010, we decided to escape it this time. Although vintage and antique shopping does hold a particular attraction to us, but the circumstances haven't changed - the kids dislike crowds and shopping. And 2 days of rubbing shoulders (literally!) with millions of people didn't feel appealing to us either as we this week we rented an apartment right in the centre of Braderie. So, we rented an car and drove south to Chantilly.

To call it a castle will not give it enough credit. This is really a land, an estate, an island of peace, serenity, beauty, and... luxury. Nothing I've seen in France so far struck me with such force of its wealth, refinement, confidence, and beauty. Not Versaille, not the Petergoff, not Austrian's Schoenbrun, or any other domain out the dozens I've seen, exhibit such monumental architectural cohesion and leaves such a deep impression. It is imposing and grand without being being overly touristy and fake glamour that inevitably creeps in with it.

The history of the area on the web is sketchy, intertwined with the history of France and in many painful ways is reflective of its history. Although Chantilly estate existed since the mid-Ages, the work on building the estate started in the 15th cc. when it was handed to the house of Montmorecy. Later the estate was inherited by the Great Conde and belonged to the great Prince's family till the Revolution. A huge part of the Chantilly glory belongs to the Duke of Aumale, who inherited the estate from his uncle after the Revolution. Left with no heirs, the Duke of Aumale undertook massive restoration of the property and bequeathed Chantilly to the state of France with a few conditions, namely, public access and daily operation of the property.


A view of the main Chateau

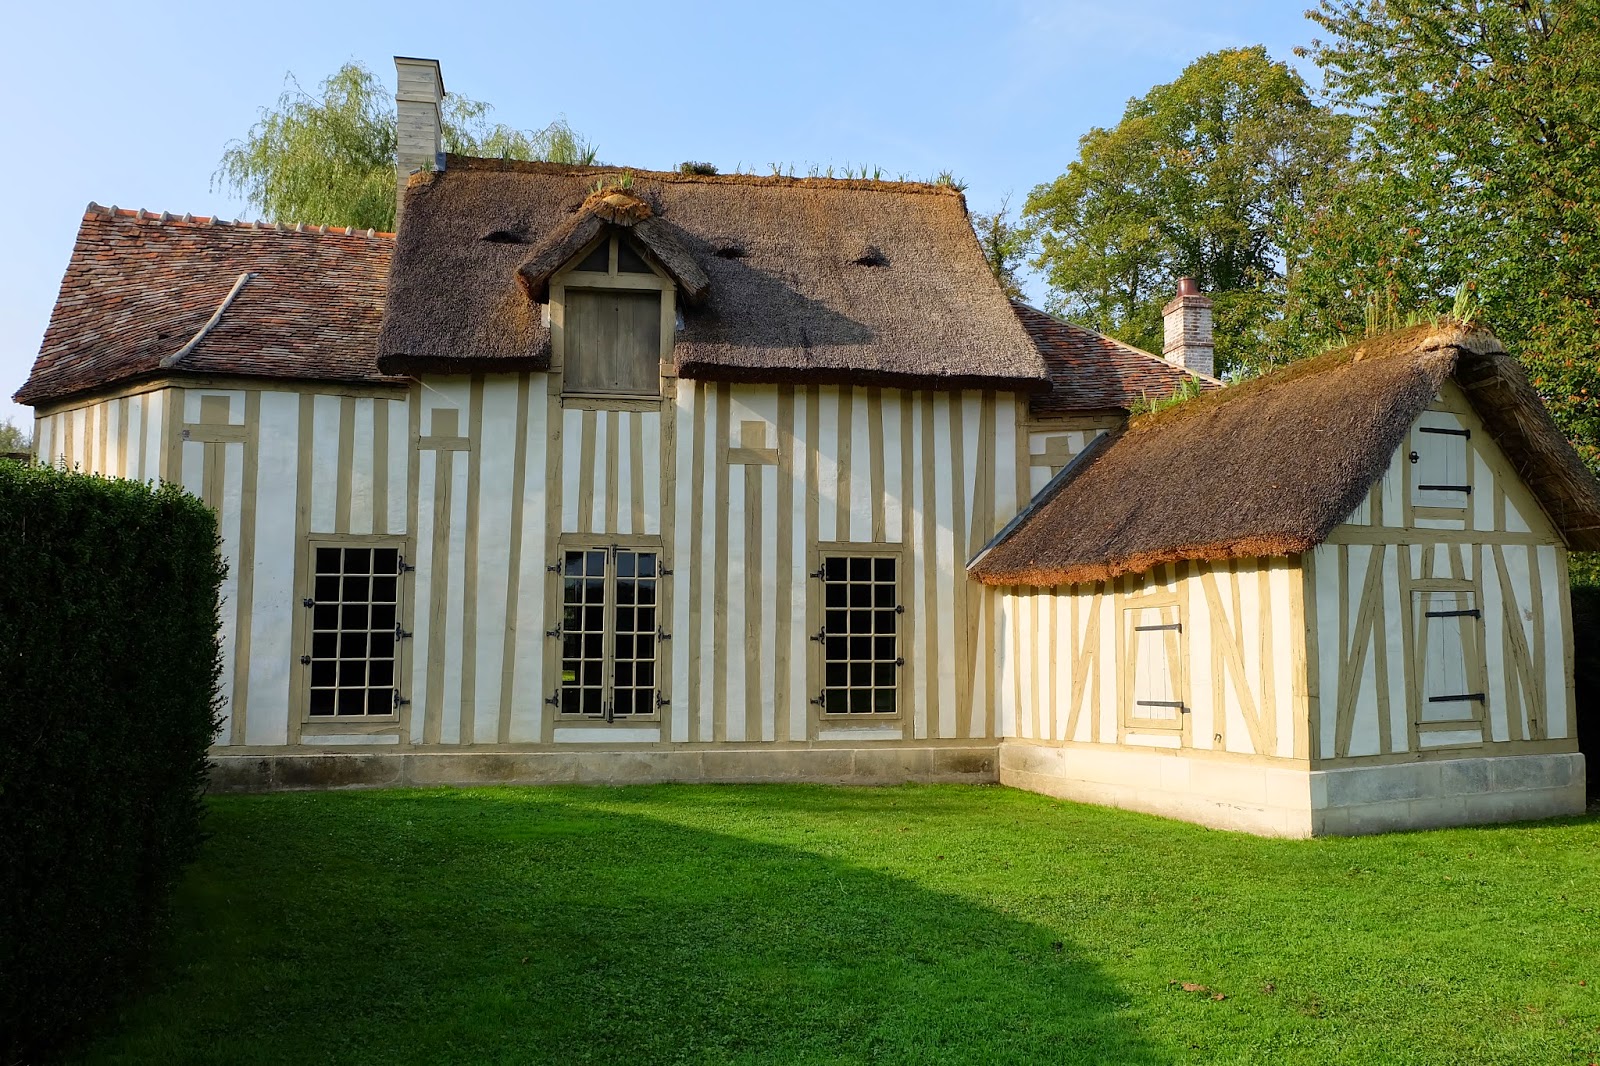
Les Hameaus - a fashion picked up by Marie-Antoinette

The extensive Chantilly Gardens

The Chateau, an inner view


Read more »